Finding the right shade of Maybelline Instant Age Rewind concealer swatches shouldn't feel like a high-stakes gambling match at the drugstore. We've all been there. You're standing under those aggressive, flickering fluorescent lights, staring at a wall of plastic tubes, trying to guess if "Sand" is actually beige or just a fancy name for "Orange." It’s frustrating.
Maybelline's Instant Age Rewind Eraser—affectionately known as the "sponge-tip guy"—is a cult classic for a reason. It’s cheap. It works. It hides the fact that you stayed up until 3:00 AM scrolling through TikTok. But because the formula is quite pigmented, picking the wrong shade isn't just a minor oopsie; it’s a visible streak of evidence on your face.
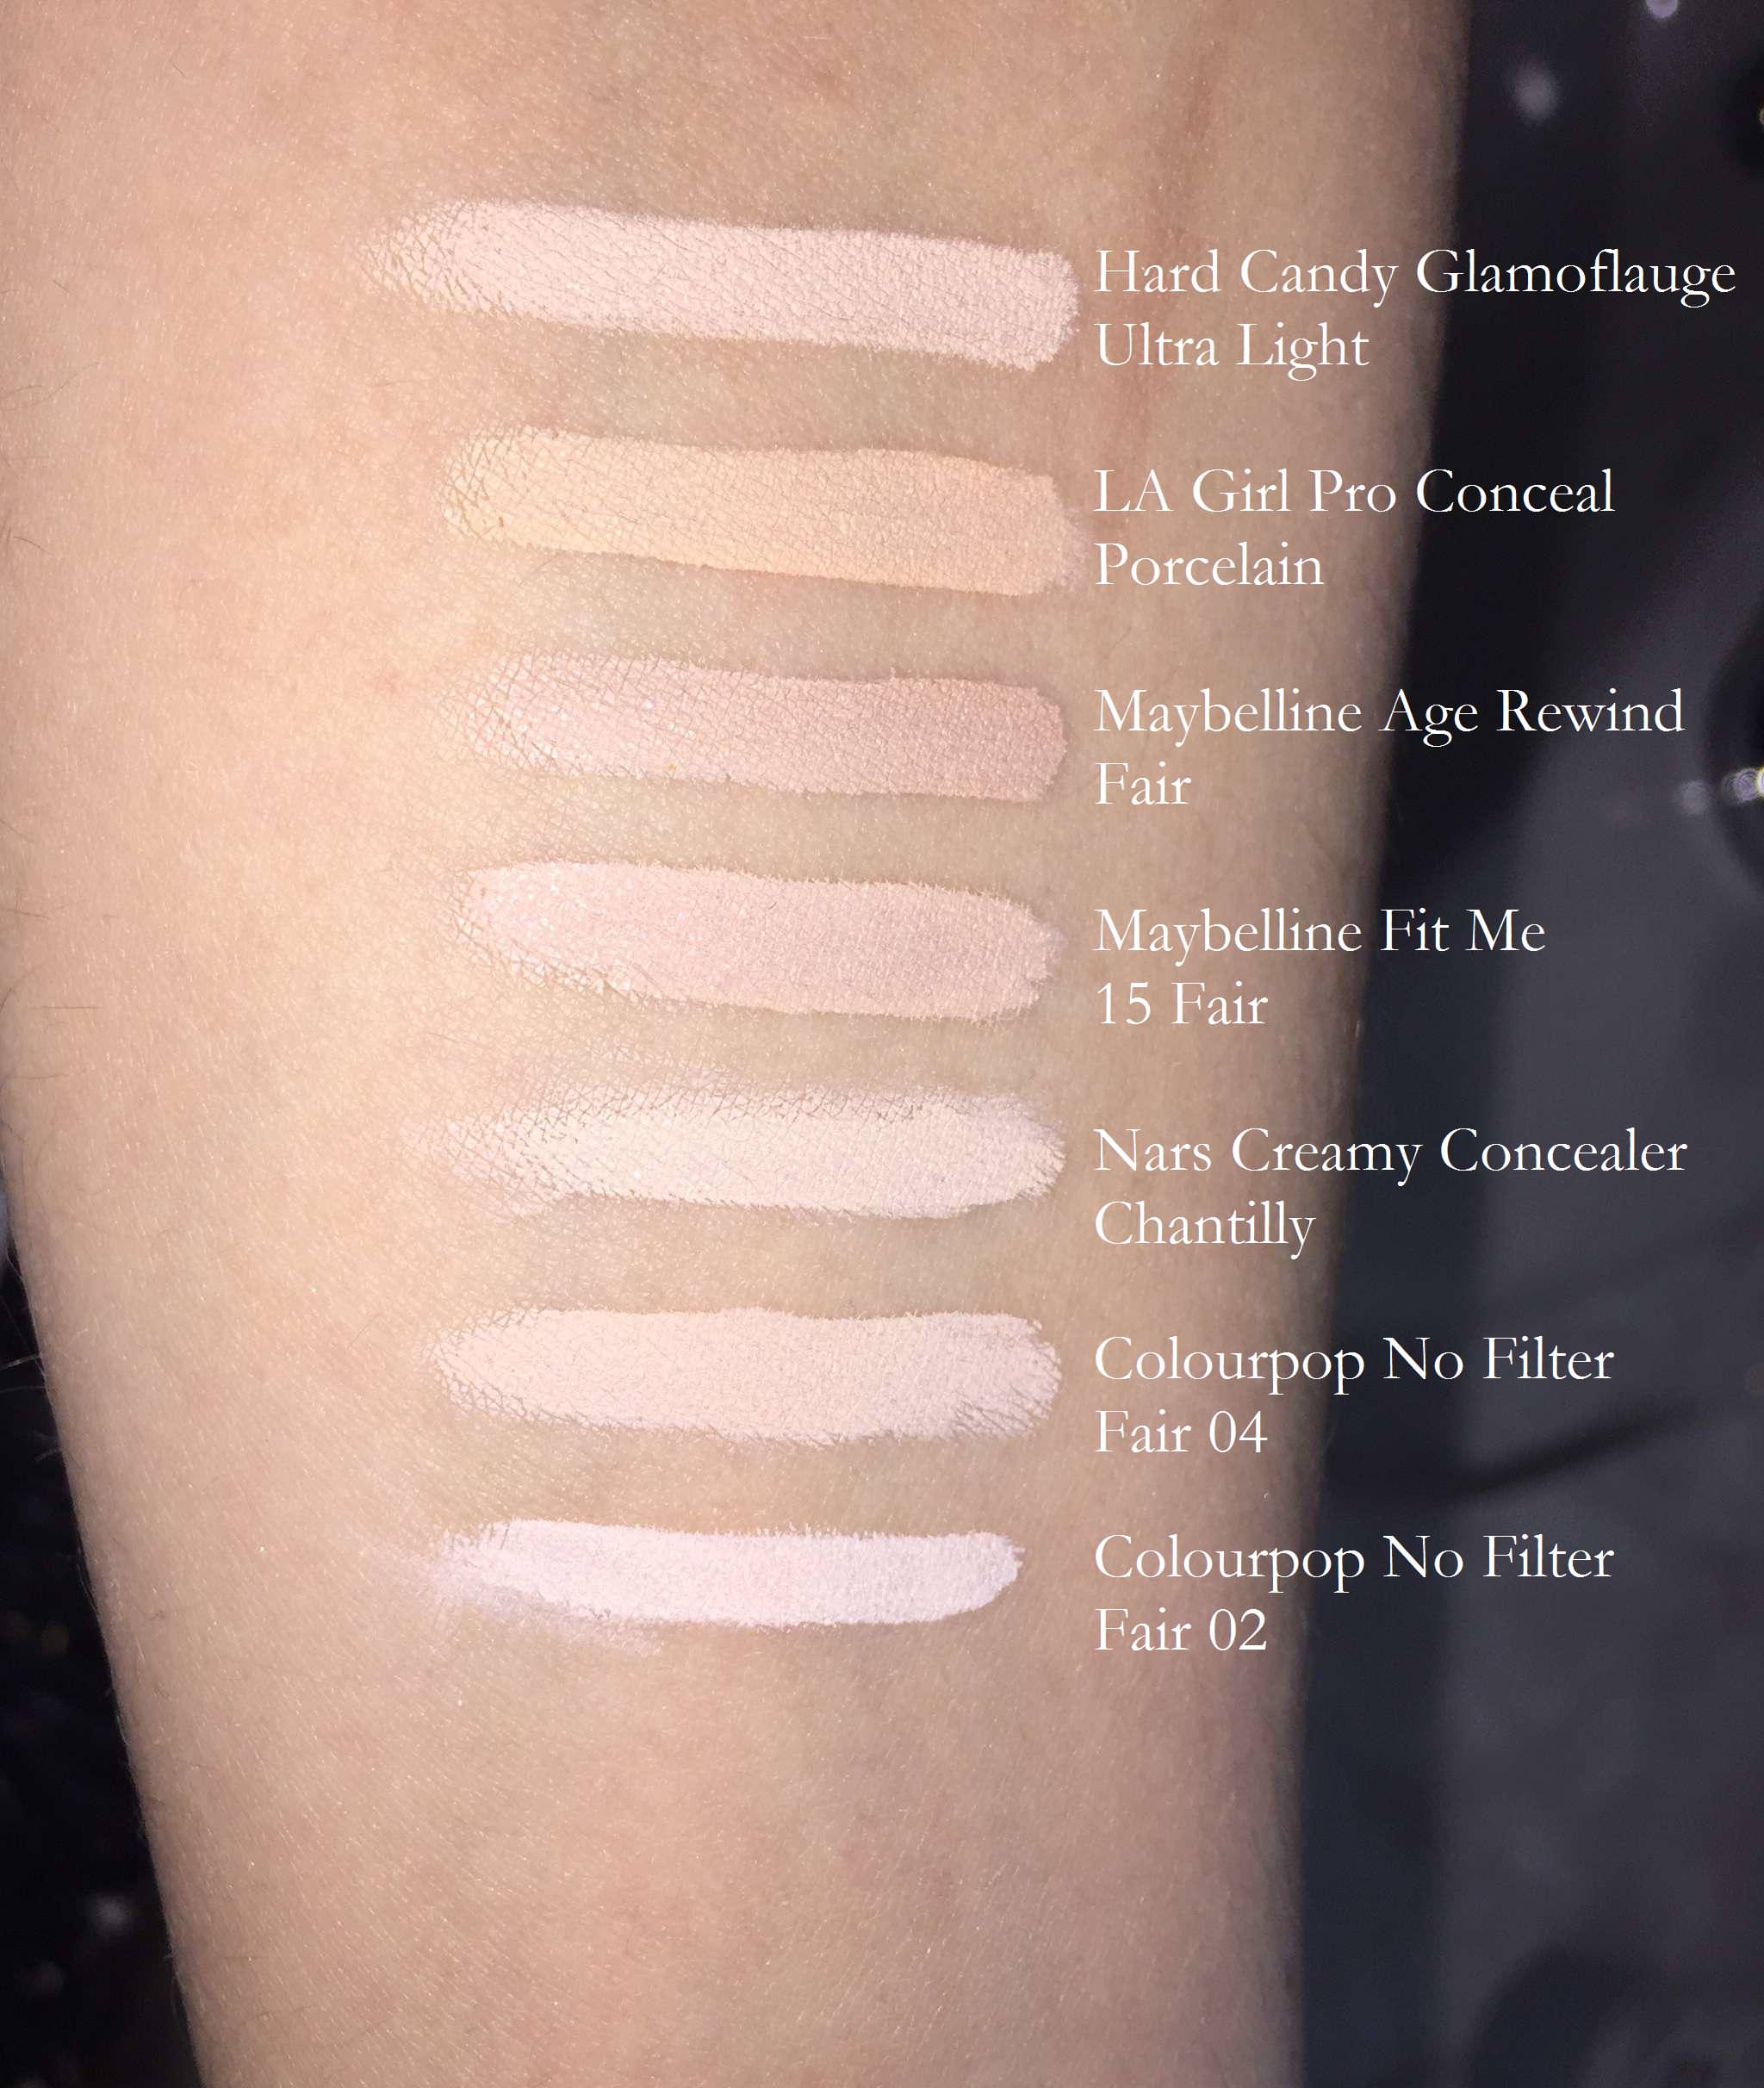
Why Maybelline Instant Age Rewind Concealer Swatches Are So Tricky
The range has expanded massively over the years. That's a win. But more choices mean more ways to get it wrong. The undertones are the real culprit here. You can find two shades that look almost identical in the tube, but once they hit your skin, one turns gray and the other looks like a peach crayon.
Here is the thing: the "Light" shade isn't always light. In fact, many users find that "Fair" is almost stark white, while "Light" has a surprisingly strong yellow base. If you have cool undertones and grab "Light" because you think you’re a light-skinned person, you’re going to look a bit sallow. Honestly, it’s all about the letters and numbers on the cap, but even those change depending on whether you’re buying in the US, Europe, or Asia.
The Fair and Light Spectrum
Let's break down the pale end of the spectrum. 110 Fair is the go-to for the "porcelain" crowd. It’s very neutral, almost leaning pink. If you’re someone who burns the second you think about the sun, this is likely your match. Then you have 120 Light. This is arguably the most popular shade in the world, but it is deceptively warm. It works beautifully for brightening the under-eye area if you have a slight tan or naturally golden undertones.
If you’re stuck between the two, look at your veins. Blue or purple veins? Stick with Fair. Greenish? Light is your best friend.
Then there is 115 Ivory. People often skip this, but it’s the secret weapon for neutral-to-cool skin that finds "Fair" too ghostly. It bridges that gap perfectly. It has enough pigment to cover a dark circle but enough "coolness" to melt into the skin without looking like a yellow patch.
The Neutral and Medium Tones
Moving into the middle of the pack, things get interesting. 130 Medium is a staple. It’s a solid, true-medium shade. However, if you are looking at Maybelline Instant Age Rewind concealer swatches and you see 140 Honey, don’t assume it’s just a darker version of Medium. Honey is specifically formulated with a deep peach/salmon undertone.
Why does that matter?
Color correction.
If you have very dark, blue-toned under-eye circles, using a shade like Honey (even if it seems a bit dark for your overall skin tone) can actually neutralize the blue better than a lighter shade would. You tap a tiny bit of Honey on the darkest part, then layer a brightening shade like 122 Sand on top.
Sand is a weird one. It’s lighter than Honey but more golden than Light. It sits in this "Goldilocks" zone for people with light-medium skin who find everything else too pink.
Deep and Rich Shades
Maybelline took some heat years ago for a lack of depth, but they’ve stepped up. Shades like 146 Glow and 149 Deep Bronze have changed the game for deeper skin tones. The "Glow" shade is particularly interesting—it’s not just a concealer; it’s marketed as a brightener. On deep skin, it acts as a subtle highlight that doesn’t look ashy.
When swatching the deeper shades, pay attention to the "redness." Some deep concealers turn very red or brick-like. 148 Walnut is a fantastic example of a balanced deep shade that maintains a neutral-warm base without going full-on mahogany.
The Correctors: Neutralizer and Brightener
You can’t talk about this line without mentioning the two "specialist" shades. They don't look like skin colors.
- The Neutralizer (150): This is yellow. Like, legitimately yellow. It’s designed to cancel out extreme purple or red tones. If you have a bruise or very prominent veins under your eyes, this is the primer for your concealer.
- The Brightener (160): This is pink. It looks like a soft petal pink. This is meant for the inner corners of the eyes to "wake up" the face.
Don't use these all over. You'll look like a cartoon character. They are strategic tools. Use the "twist" mechanism to get just a tiny drop onto the sponge, dab it specifically where the discoloration is, and then go over it with your "skin-match" shade.
How to Swatch Like a Pro (And Why Your Arm is Lying)
Stop swatching on your wrist. Just stop.
Your inner arm is usually three shades lighter than your face and has different undertones because it rarely sees the sun. If you want an accurate Maybelline Instant Age Rewind concealer swatch, you have to swatch on your jawline or, better yet, directly on the area you intend to conceal.
Wait 30 seconds.
This formula dries down. Most concealers undergo a slight "oxidation" process where they deepen or change hue once the moisture evaporates and the pigment sets. What looks like a perfect match when wet might turn a shade darker a minute later. If you're at the store, swatch it, walk around for five minutes, and then look at it in the natural light near the entrance. Drugstore lighting is a liar.
The Sponge Applicator Controversy
We have to talk about the "Micro-Eraser" sponge. Some people love it. Others find it unhygienic. If you’re swatching a tester in a store (if they even have them), please, for the love of all that is holy, do not put that sponge on your face.
If you own the product, the sponge is great for a quick "swipe and go" application, but it does soak up some product. If you’re a germaphobe, you can actually pop the sponge off and just use the plastic nib to dispense product onto the back of your hand. But honestly? The sponge is part of the magic. It mimics a finger tap and blends the product as you apply it.
Real-World Comparison: Age Rewind vs. Fit Me
A common question is how these swatches compare to Maybelline’s other heavy hitter, the Fit Me Concealer.
Fit Me is more liquidy. Age Rewind is "whipped."
Because Age Rewind is thicker, the colors appear more saturated. If you are a "10 Light" in Fit Me, you might find that "120 Light" in Age Rewind is actually a bit darker and more yellow. They are not a 1:1 match across lines. This is a huge mistake people make. They assume the brand stays consistent with naming across different formulas, but the base ingredients change how the pigment reflects light.
Actionable Tips for Choosing Your Shade
- Determine your goal: Are you covering a blemish or brightening your eyes? For blemishes, match your skin exactly. For eyes, go one shade lighter.
- Check the "Warmth": If your foundation usually looks too orange on you, look for Age Rewind shades like 110 Fair, 115 Ivory, or 144 Caramel (which has a surprisingly cool undertone for a dark shade).
- Layering is better than caking: Don't try to find one shade that does everything. Buy a corrector (Neutralizer) and a skin-tone match. The result looks ten times more natural.
- Use the "Triangle" method: Instead of just a dot, swatch in a small inverted triangle under the eye. This shows you how the shade interacts with both the dark circles and the cheek color.
The Maybelline Instant Age Rewind Eraser remains a top-tier choice because the formula is infused with haloxyl and goji berry, which genuinely helps with puffiness over time. But the skincare benefits don't matter if you're wearing a shade that makes you look like you're wearing a mask. Take the extra five minutes to study the undertones of the swatches rather than just the "Fair/Medium/Deep" labels.
Your best bet is to find a creator online who has your exact skin tone—not just "white" or "brown," but someone with your specific redness or sallowness—and see how the shades look on them in natural daylight.
To get the most out of your purchase, start by identifying your primary undertone (cool, neutral, or warm) and then select the shade that looks one step "too light" in the tube, as this formula tends to settle into a more natural, slightly deeper tone once it interacts with your skin's natural oils and sets. Check the batch code on the bottom of the tube to ensure you're getting a fresh product, as older formulas can sometimes separate and affect the color accuracy of the swatch.